Lecture setup for remote talks and interviews
Why?
I was on the academic faculty market during the 2020 cycle. This meant I got exactly one in-person interview done before quarantine went into effect. Given that I was going to be doing a large number of job interviews via video call, I (on the precient recommendation of my spouse) picked up relevant hardware to improve the quality of my presentations.
NOTE: Some of this is now out of date, I'll continue to update
TL;DR
- Install and use OBS
+
VirtualcamI now prefer StreamFX.- Get a good microphone.
- Get diffuse lighting.
Example results
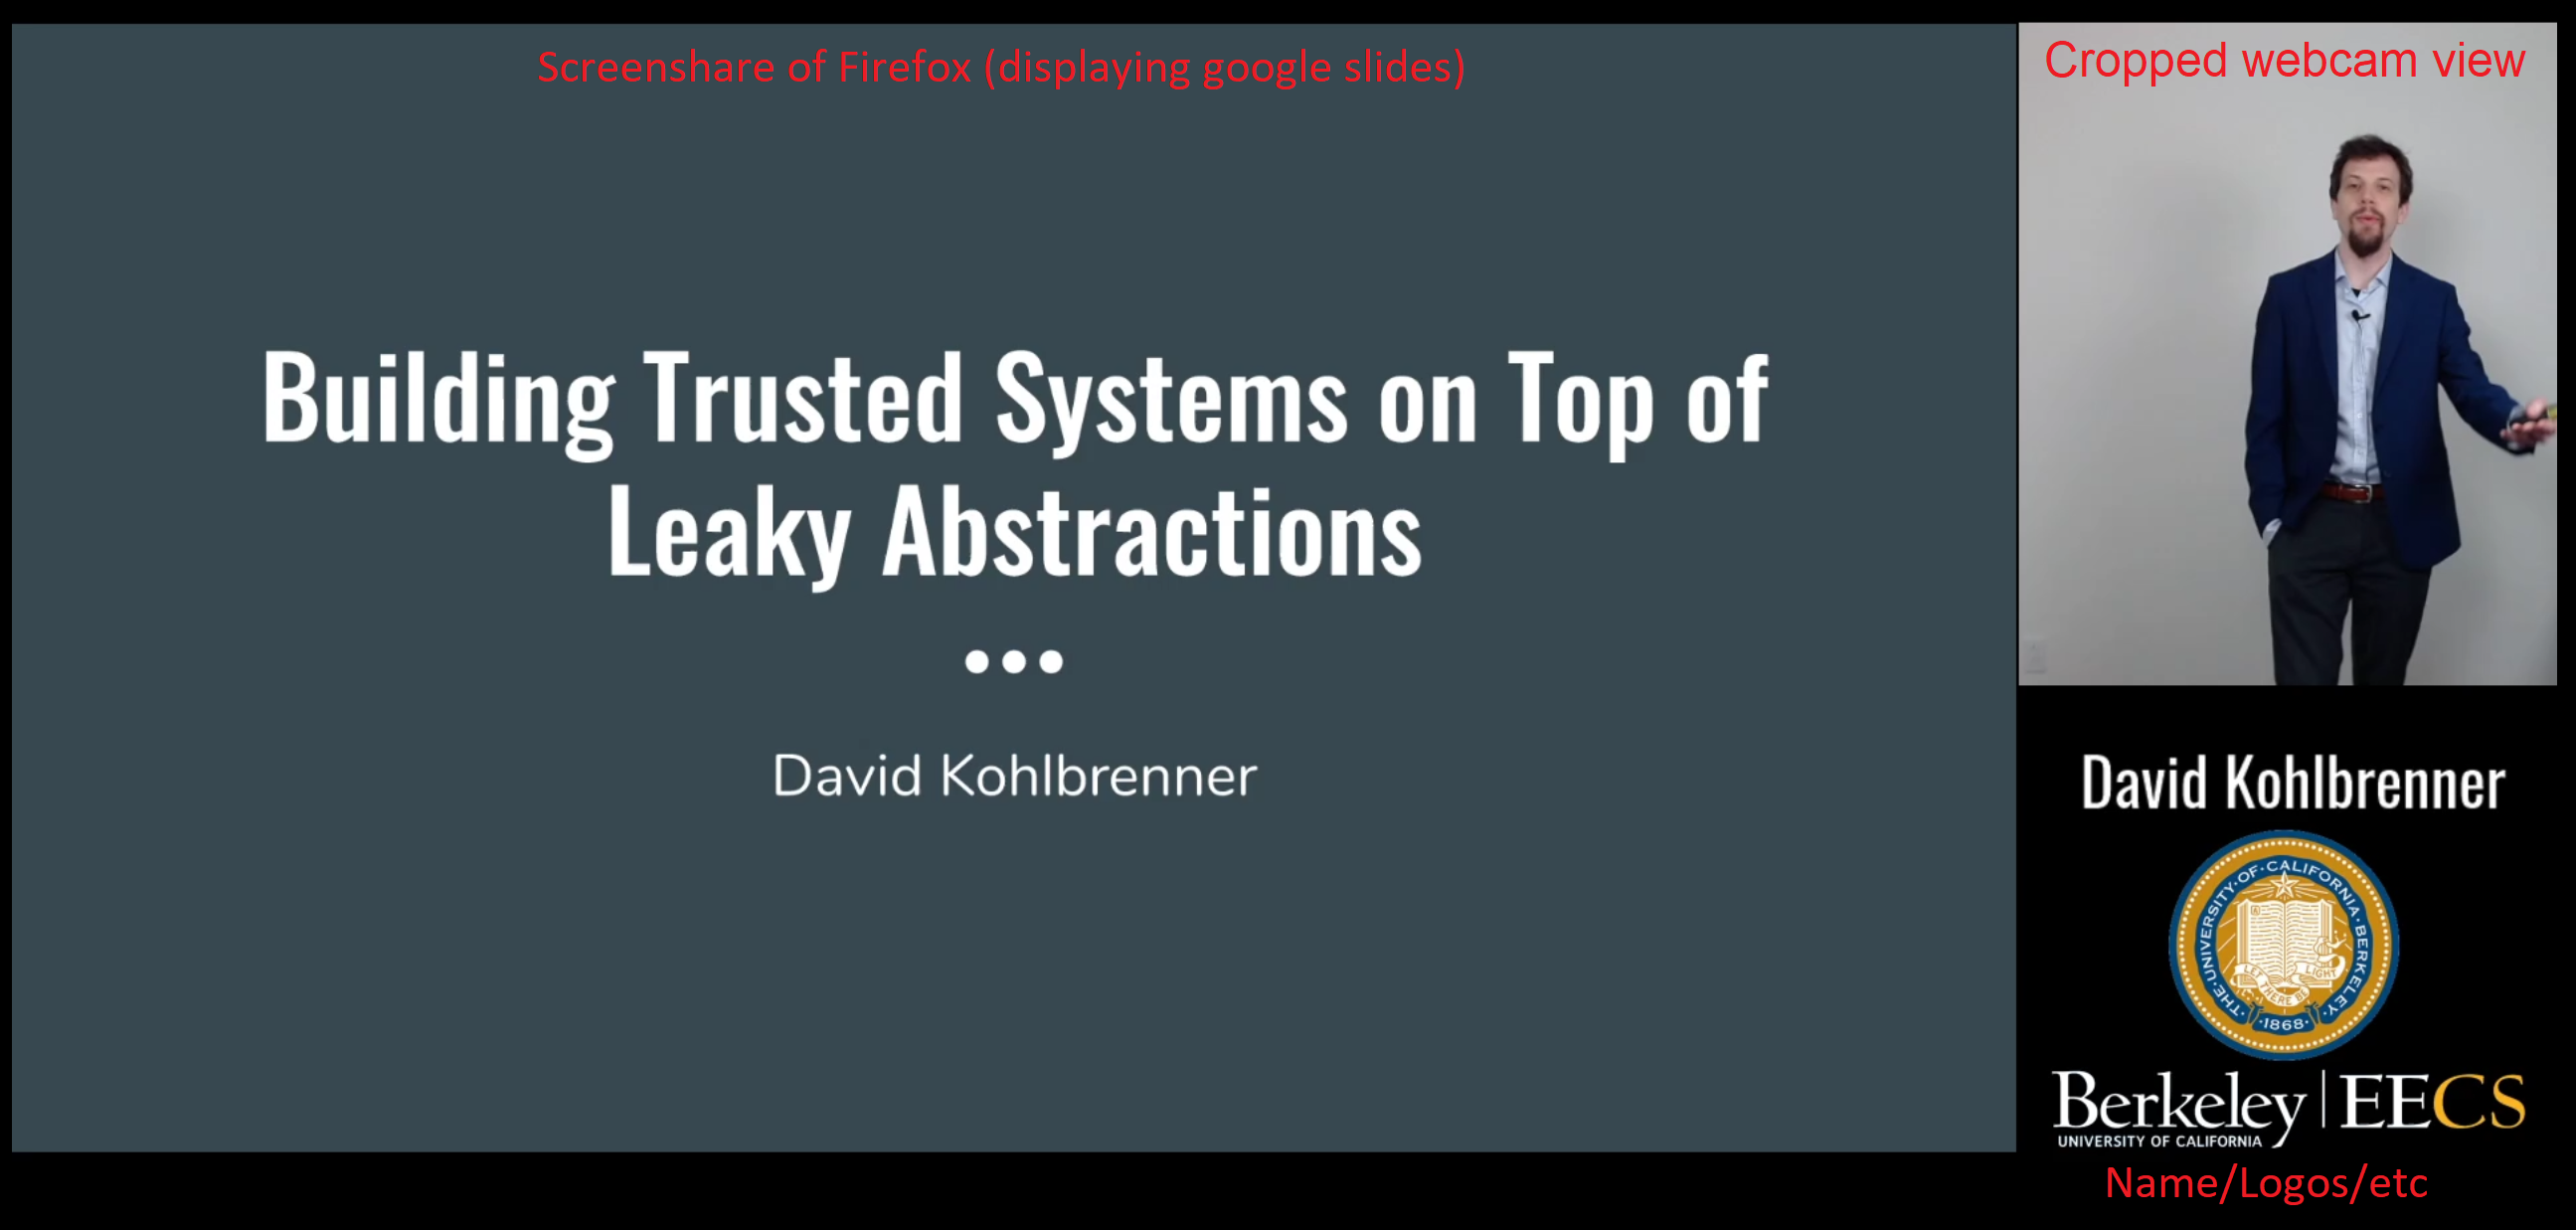
Still from a local recording of talk.
This is my job talk from my University of Washington interview. Note that this is using a 720p webcam, I upgraded after this interview.
Physical Setup
This will work much better if you have 6'+ of space to setup in for standing. It works fine with 3' for sitting.
A quick note on costs: they are up as of writing this post. Some hardware is much harder to purchase now (e.g., the c920s). Get what you can.
Lighting
Good lighting will drasticaly improve the visual quality of your video. Better lights = better camera frame rate + better looking you! Key things are diffusion and color temperature.
I'm using a pair of cheap photography softboxes (HPUSN, set of 2 from amazon for $60 total). There are a thousand articles on good 3-point lighting. e.g., this. TODO for information on lighting setup. You want at least 2-point.
Camera
Get a Logitech c920s if you can. Otherwise anything with at least 720p works. 720p vs 1080p is a noticable difference to the viewer in 1-1 interviews more than a talk.
Microphone
If you get one piece of hardware, get a good microphone. I'm using a $20 wired lavalier microphone (powerdewise). Wireless bumps the costs significantly for near zero benefit in this type of setup.
Computers
Use ethernet if you can, it will avoid a huge number of potential problems with lag and reduces the impact of anyone else using the network when you are. I'm using a 2 monitor setup, but it technically works fine with one.
Audio Output
The big advantage of a good lavalier mic is that you can have audio output go to speakers. You'll be able to hear and interact with everyone with no feedback. Bluetooth earbuds are a reasonable alternative as well.
Remote
For advancing slides while standing, I use a standard presentation remote. A wireless mouse or simply a keyboard with a long cable are OK, but significantly more awkward.Software Setup
Software is more interesting, there are a few complexities here with configuration but everything is free.
Open Broadcasting Studio
I'm using OBS (https://obsproject.com/) to manage all my video and audio.
Video Compositing

In it, I have a scene for my talk that consists of:
- Webcam input (cropped)
- Static text/images
- Live screenshare of a Firefox browser window (HW
acceleration must be disabled in the browser! This has my
slides displayed)
- You will want to play with both the size of the browser window itself, as well as the scaling/placement in OBS.
- My solution was to have FF in fullscreen on one monitor, and then scale the OBS mirror of it to where I wanted. This resulted in a reproducable configuration every time.
Video Output
I use StreamFX to export a virtual camera. This camera can EITHER be consumed directly from Zoom/Hangouts/Meet/etc as your 'camera' or be screen-shared as an external camera in Zoom. (For Zoom specifically you will get a much higher resolution output if you screen-share as an external camera rather than use this as your 'face cam'.)
You can alternatively use the OBS virtualcamera plugin to export a 'camera' in the same way (https://obsproject.com/forum/resources/obs-virtualcam.539/)
Audio Configuration
Audio is more annoying. I'm pushing the mic through OBS (and applying noise gates / filtering there), but OBS doesn't export a virtual mic. Instead, I've enabled monitor mode on the mic in OBS, then set OBS's monitor output mode to the input for a virtual audio cable (using VBCABLE). I then use the OUTPUT for that virtual audio cable as my 'microphone' in Zoom/etc.
Audio was the most annoying part, so I'd suggest just directly using the mic in Zoom and ignoring doing the filtering in OBS if you can avoid it.
Scene switching
A nice feature of all of this is that I can create multiple scenes in OBS and switch between them as needed immediately. I've got an interview one, a "i'm on break" one, and the talk setup. For lecturing examples I can see this being incredibly useful. You can setup stuff to show writing/slides/you etc and switch between them at a button press.
Additional options
As the academic interview cycle is now over, I've started using this setup for lecuturing as well.
Document camera
I've setup a simple document camera setup using a second (older) webcam. In this case, I've attached a camera vertically to a cardboard box/wall facing down towards the desk.
In OBS I've then created a scene that uses that camera rather than a window capture of slides. Note that you'll need to flip the image in OBS so that it is right-side-up.
This then allows me to seamlessly switch scenes in OBS between slides+lecturer to paper+lecturer without disrupting the layout/flow.
Chroma Key/Backgrounds
OBS has built-in filtering for chroma key/greenscreening. I did not use these as I didn't have a good colored backdrop to use. You can then layer a still image/slides/animation behind the camera view in OBS to get whatever background you want!
Good options are blues and greens, as these are easiest to isolate out of the background. Important notes here are that you want to be physically close the colored background, and lighting becomes even more important.
Using the setup
Standing vs Sitting
This will depend enormously on personal preference and space constraints. I stood for all presentations I gave, and sat for all 1-1 interviews. By setting different video cropping on OBS for each scene I avoided needing to adjust the camera physically.
Standing will make it nearly impossible to read questions in Zoom chat. I view this as a positive since it means questions will be asked verbally, in a more familiar format.