Software-Defined Radio from the Comfort of Your Couch
September 2020
[Work in progress]
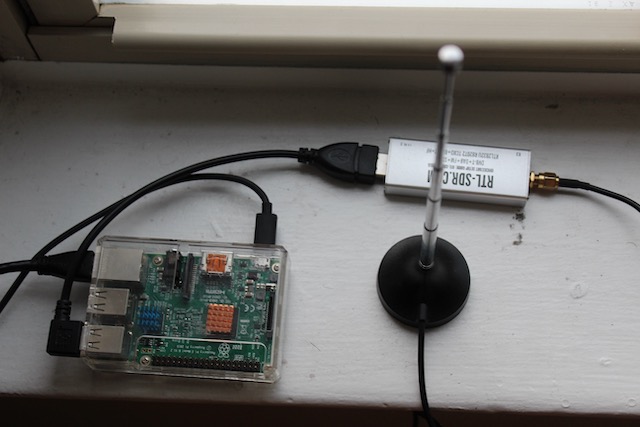
Software-defined radio is a rewarding hobby. You can receive GPS signals, detect lightning strikes, track maritime traffic and much more, all using equipment that can be had for ~$30 USD. However, one of the less fun parts is having to stand outside in the rain while trying to capture that weather satellite signal. Luckily, there is a better way: rather than connecting to the receiver and antenna directly to your computer, you can leave the antenna in the rain, and connect to it over the network. In fact, if you have a good enough internet connection, you can listen to your radio from anywhere in the world!
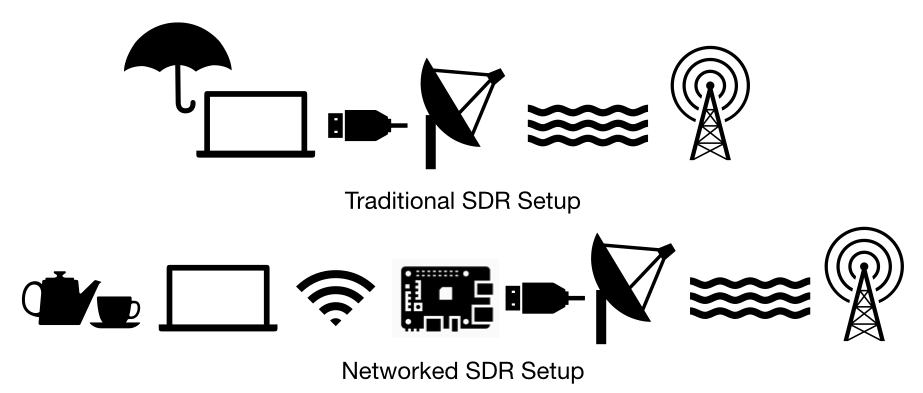
I will outline how to put together such a networked SDR setup, in contrast to the traditional SDR setup. Both are shown in the diagram below.
Equipment
- Supported Raspberry Pi (see “Bandwidth” below)
- MicroSD Card
- Wired internet or 5GHz Wi-fi (see “Bandwidth” below)
- RTL-SDR dongle
- Computer to recieve, process and display signals
Bandwidth
This setup requires a large bandwidth (think “size of the network pipe”) between the Raspberry Pi server and the receiver. In my experience, a bandwidth of 2.5 MB/s (equivalent to 20 Mbps) to 4 MB/s (32 Mbps) is required for a reasonable experience. [1]
Unfortunately, the wi-fi adapter on the older Raspberry Pi boards is not fast enough to support this. Additionally, wi-fi connections tend to have a large latency variance—this could cause cut-outs in your connection. For these two reasons, I recommend using a wired network.
If you cannot run an ethernet cable to the Pi, use a 5 GHz wi-fi with a strong signal. The Pi’s on-board antenna begins to experience signal degregation as little as 5 meters out from the router.
The following table lists which Pi versions and network connections have sufficient bandwidth. Green is good, orange is marginal and red most likely will not work.
Server Setup
I assume that you have a supported Pi with the official Raspberry Pi operating system installed. If not, the Raspberry Pi Imager is probably the easiest way to get it on your Pi’s MicroSD card.
The software we will be using to send radio packets is called SoapySDR. Installation will require the command line. Open the Terminal application, which is on the Pi desktop by default.
First, fetch information about all the latest software:
sudo apt update
Then, install the software required for the Pi to recognize the receiver:
sudo apt install rtl-sdr
Now, run a diagnostic check to ensure the reciever is working right:
rtl_test
Once a few seconds have passed, press Ctrl+C. You should see something like:
If you recieve an error,
Now, install SoapySDR, which will allow us to transmit the radio data over the network:
sudo apt install soapyremote-server
Client Setup
On MacOS, I found CubicSDR to be the best option. If you have Homebrew installed, you can get CubicSDR by simply typing brew cask install cubicSDR into the terminal. Otherwise you can download a copy from the official website.
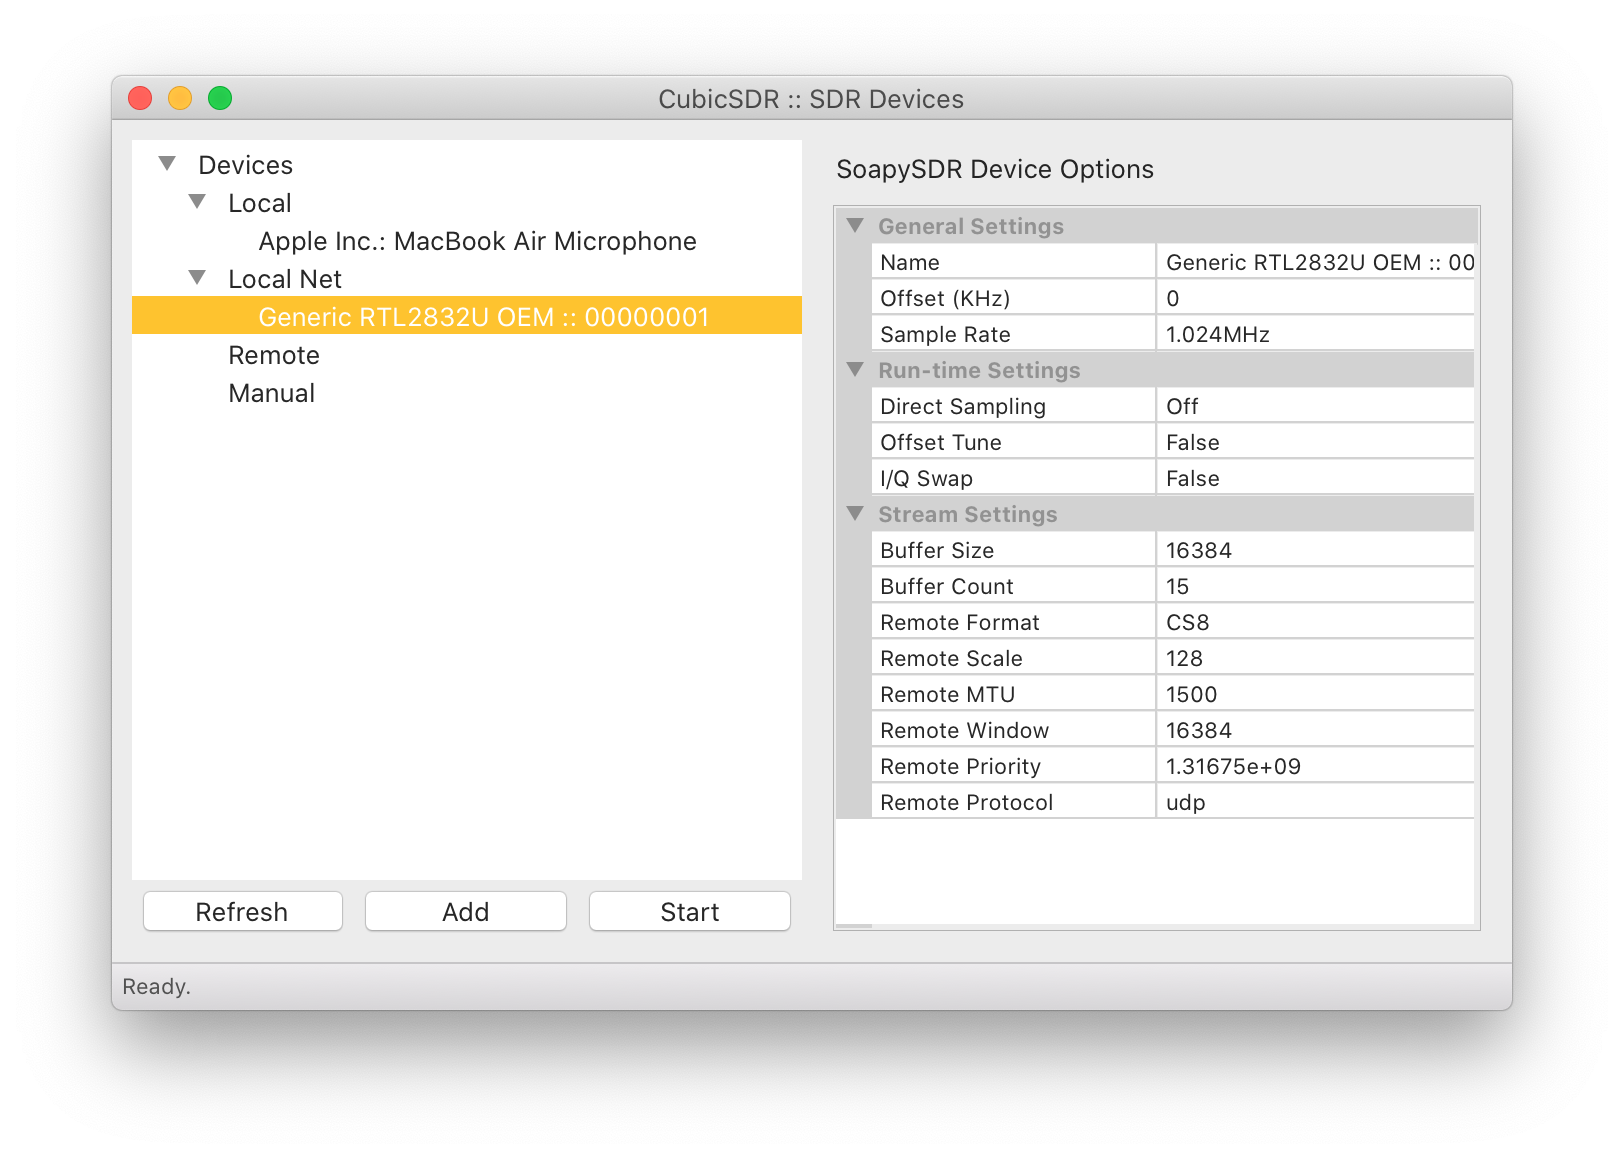
Once CubicSDR starts, you will see a screen asking you to select your reciever. If your computer is connected to the same network as the Pi, and with some luck, you should see a device appear under the ‘Local Net’ category. What this should looks like is below. If you do not see it, press ‘Add’, select SoapyRemote as the device type and enter the IP address of the Pi.
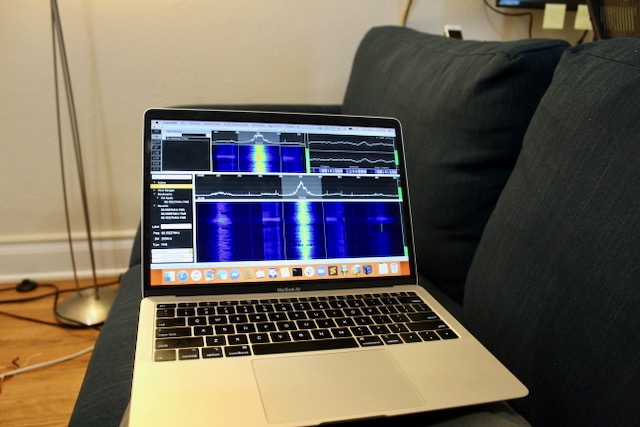
Results
With some luck, you should have something like this:
If you encounter trouble getting your setup to work, get in touch—I’m happy to help.
Notes
[1] A bare minimum bandwidth of 0.5 MB/s (4 Mbps) is possible, but the experience at this level is pretty terrible. The sampling rate will be very limited and you’ll only be able to find a signal if you stumble on its exact frequency.